 MAPS
Raise It, Lower It
Summary
Students use keyboard movement to understand that a sharp raises a note by one half step and a flat lowers a note by one half step. The activity can be adapted for different settings: younger learners can move on a floor keyboard, older students can work from a visual keyboard, and class-piano students can play the answer directly. Students also test examples such as E-sharp and C-flat to avoid the misconception that sharps and flats always lead to black keys.
Procedures
- 1
Introduce sharp and flat through movement. Start on a clear white-key note such as D. Explain: “A sharp raises a note by one half step,” and move from D to D-sharp. Return to D and explain: “A flat lowers a note by one half step,” moving from D to D-flat. Emphasize both direction and distance: sharp = one half step higher; flat = one half step lower.
- 2
Raise It or Lower It. Give a starting note and an instruction, such as “Start on G. Sharp it” or “Start on A. Flat it.” Students respond in the format appropriate to the class: move on a floor keyboard, point on a keyboard diagram, or play the resulting pitch on their own keyboards.
- 3
Reverse the question. Show a move from a starting note to an adjacent key and ask, “Did the pitch move higher or lower?” and “Which accidental describes that change?” Students work backward from the pitch movement to identify sharp or flat.
- 4
Break the black-key assumption. Include E-sharp, B-sharp, F-flat, and C-flat. Ask students to move one half step from the starting note and observe that the resulting key may be white. Summarize: sharps and flats describe a one-half-step change in pitch; they do not mean “play a black key.”
- 5
Accidental Challenge. Mix quick prompts such as “F-sharp,” “B-flat,” “E-sharp,” and “C-flat.” Students show the answer by moving, pointing, or playing, then briefly explain the direction of the half-step change. Increase speed only after responses are accurate.
Variations
1. Human Keyboard — Younger Learners: Use a large floor keyboard. A student stands on the starting note and physically moves one half step higher for a sharp or one half step lower for a flat. Rotate students so everyone has a turn to move and explain the direction.
2. Visual Keyboard — Older Students or Theory Classes: Use a projected or printed keyboard. Give prompts such as D-sharp, A-flat, E-sharp, and C-flat. Students point to the target key and explain the one-half-step movement without needing to physically move.
3. Play the Answer — Class Piano: Give the class a starting note and an accidental instruction. All students respond simultaneously on their own keyboards. Follow with occasional “Explain your move” prompts so students connect the played answer with higher/lower by one half step.
4. Find the Mistake: Present statements such as “A sharp always means a black key” or demonstrate an incorrect half-step move. Students identify the error and correct it using the higher/lower-by-one-half-step rule.
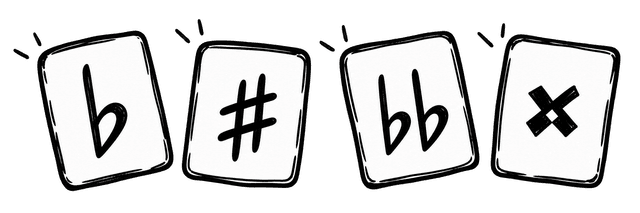
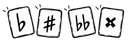
5. Advanced Extension: After students are secure with sharps and flats, introduce the double sharp (*) and double flat (♭♭). Explain that a double sharp raises a note by two half steps and a double flat lowers a note by two half steps. Use the same movement logic as the main activity, for example C → C♯ → C* and D → D♭ → D♭♭. Students can move, point, or play the result and explain the total distance. Include examples that land on both white and black keys so students continue to focus on pitch distance rather than key color.
Activity Preparation
Materials
a.Keyboard diagram, projected keyboard, floor keyboard, or student keyboards, depending on the teaching setting.
b.Optional note-name cards and sharp/flat symbol cards.
Prior Knowledge
a.Students know the white-key letter names A–G.
Students understand a half step as the distance between two adjacent piano keys.
Activity Sources
- Source Type:
- MAPS Original
- Adaptation Notes:
- Adapted into a flexible keyboard-based activity that teaches sharp and flat as one-half-step pitch changes across elementary, theory, and class-piano settings.
MAPS teaching activities may come from a variety of sources, including original contributions by the MAPS team, online resources, published materials, activities learned from teachers, activities shared by colleagues, traditional teaching practices, and other sources. When a source can be reasonably identified, we make every effort to acknowledge it on the relevant activity page or in the accompanying reference information.
Some content may be organized, translated, structured, or adapted by the MAPS team for specific teaching contexts. Such editorial or instructional adaptation does not mean that MAPS claims ownership of the underlying third-party material. Rights to third-party content remain with the original authors, publishers, or other lawful rights holders.
If you are an author, copyright holder, or authorized representative and have questions or concerns regarding the source, attribution, or use of any content, please contact us:
Email: musicactivityps@gmail.com
Raise It, Lower It
Summary
Students use keyboard movement to understand that a sharp raises a note by one half step and a flat lowers a note by one half step. The activity can be adapted for different settings: younger learners can move on a floor keyboard, older students can work from a visual keyboard, and class-piano students can play the answer directly. Students also test examples such as E-sharp and C-flat to avoid the misconception that sharps and flats always lead to black keys.
Procedures
- 1
Introduce sharp and flat through movement. Start on a clear white-key note such as D. Explain: “A sharp raises a note by one half step,” and move from D to D-sharp. Return to D and explain: “A flat lowers a note by one half step,” moving from D to D-flat. Emphasize both direction and distance: sharp = one half step higher; flat = one half step lower.
- 2
Raise It or Lower It. Give a starting note and an instruction, such as “Start on G. Sharp it” or “Start on A. Flat it.” Students respond in the format appropriate to the class: move on a floor keyboard, point on a keyboard diagram, or play the resulting pitch on their own keyboards.
- 3
Reverse the question. Show a move from a starting note to an adjacent key and ask, “Did the pitch move higher or lower?” and “Which accidental describes that change?” Students work backward from the pitch movement to identify sharp or flat.
- 4
Break the black-key assumption. Include E-sharp, B-sharp, F-flat, and C-flat. Ask students to move one half step from the starting note and observe that the resulting key may be white. Summarize: sharps and flats describe a one-half-step change in pitch; they do not mean “play a black key.”
- 5
Accidental Challenge. Mix quick prompts such as “F-sharp,” “B-flat,” “E-sharp,” and “C-flat.” Students show the answer by moving, pointing, or playing, then briefly explain the direction of the half-step change. Increase speed only after responses are accurate.
Variations
1. Human Keyboard — Younger Learners: Use a large floor keyboard. A student stands on the starting note and physically moves one half step higher for a sharp or one half step lower for a flat. Rotate students so everyone has a turn to move and explain the direction.
2. Visual Keyboard — Older Students or Theory Classes: Use a projected or printed keyboard. Give prompts such as D-sharp, A-flat, E-sharp, and C-flat. Students point to the target key and explain the one-half-step movement without needing to physically move.
3. Play the Answer — Class Piano: Give the class a starting note and an accidental instruction. All students respond simultaneously on their own keyboards. Follow with occasional “Explain your move” prompts so students connect the played answer with higher/lower by one half step.
4. Find the Mistake: Present statements such as “A sharp always means a black key” or demonstrate an incorrect half-step move. Students identify the error and correct it using the higher/lower-by-one-half-step rule.
5. Advanced Extension: After students are secure with sharps and flats, introduce the double sharp (*) and double flat (♭♭). Explain that a double sharp raises a note by two half steps and a double flat lowers a note by two half steps. Use the same movement logic as the main activity, for example C → C♯ → C* and D → D♭ → D♭♭. Students can move, point, or play the result and explain the total distance. Include examples that land on both white and black keys so students continue to focus on pitch distance rather than key color.
Activity Preparation
Materials
a.Keyboard diagram, projected keyboard, floor keyboard, or student keyboards, depending on the teaching setting.
b.Optional note-name cards and sharp/flat symbol cards.
Prior Knowledge
a.Students know the white-key letter names A–G.
Students understand a half step as the distance between two adjacent piano keys.
Activity Sources
- Source Type:
- MAPS Original
- Adaptation Notes:
- Adapted into a flexible keyboard-based activity that teaches sharp and flat as one-half-step pitch changes across elementary, theory, and class-piano settings.
MAPS teaching activities may come from a variety of sources, including original contributions by the MAPS team, online resources, published materials, activities learned from teachers, activities shared by colleagues, traditional teaching practices, and other sources. When a source can be reasonably identified, we make every effort to acknowledge it on the relevant activity page or in the accompanying reference information.
Some content may be organized, translated, structured, or adapted by the MAPS team for specific teaching contexts. Such editorial or instructional adaptation does not mean that MAPS claims ownership of the underlying third-party material. Rights to third-party content remain with the original authors, publishers, or other lawful rights holders.
If you are an author, copyright holder, or authorized representative and have questions or concerns regarding the source, attribution, or use of any content, please contact us:
Email: musicactivityps@gmail.com